Posted on 1 Comment

Surface Piercings 101

Although not super common, surface piercings are a really really fun addition for the dedicated piercing enthusiast. So, what is a surface piercing? What kind of jewellery do they use? Where can I have one? Surface piercings definitely garner a lot of attention, and plenty of questions! Here we will endevour to give a solid overview of the concept, and give you enough information to make an informed decision on wether a surface piercing is right for you.

What Is A Surface Piercing?

Surface piercings are a class of piercing that includes both surface barbells and microdermals. The defining characteristic of a surface piercing is that it sits inside the skin, and does not exit the back of the tissue like a traditional piercing does. It is held in place either by a baseplate (microdermals) or a long flattened barbell (surface bar) that the skin and underlying tissue heals into.

A classic placement is the cheekbone microdermal. This one has healed a treat!

Placement

Surface work is not limited in placement like ears, noses and navels! You can be much more creative with the placements and have a lot more free reign. That being said, there are some very important rules when it comes to surface work placement.

Low Movement

In order to be successful, a surface piercing must not undergo high amounts of movement. The constant rocking motions, folding and bending that come with certain placements means that your surface piercing is more likely to reject in a shorter amount of time. Areas of high movement include the eyebrows, forehead, wrists, cheeks, chest (especially on larger chested folks!) and stomach. This does not mean that the surface piercing is a definite no-go – It is important to have your desired placement assessed by a skilled piercer. For example, our apprentice Jay has a very successful forehead microdermal. This is not a placement that I would be able to get as my forehead is much too expressive and mobile! There is generally a placement that works for everyone, you just need to be particular and informed before choosing it.

Safe!

The absolute priority of any surface work is safety. Every piercer should have your health as their number one goal! This means there are certain placements that are absolutely not recommended. These include the neck, inner wrists, legs, hands, feet etc. If you are thinking of an unusual placement that you have never seen before, think critically about it. There is usually a reason…

Lifestyle

And finally, you need to take into account your lifestyle. Even if you are anatomically suited to a particular surface piercing placement, that does not mean your lifestyle will allow for it! Think about your usual daily routine – Your clothing choices, your accessories, the positions you usually spend your day in. For example, if you are thinking about chest surface piercings but spend your days behind the wheel of a car, then maybe you will need to alter the placement as seatbelts are not your friend! Or consider the ever-popular lower back microdermals. They look awesome, but if you wear jeans, belts, or spend the majority of your day sitting down, then they may not be for you. Unless you are willing to significantly alter the way you live your life in order to support a surface piercing, you’ll need to think carefully!

Appropriate Jewellery

The main issue we see with surface piercings is the use of improper jewellery. There are many styles of jewellery, only two of which are suitable for surface work. To understand this, you need to understand the basic concept of piercing healing: A piercing will only heal correctly if the jewellery enters and exits the body at a perpendicular angle to the tissue. A piercing that exits at 90 degrees to the skin will minimise pressure points, and allows the tissue to heal appropriately around the jewellery. That means that a surface bar or microdermal must exit the skin perfectly straight!

As you can see from this diagram the use of straight, curved, flexible (bioplast) and 45 degree surface barbells should be absolutely avoided! Ask your piercer what they use, and make an informed decison on wether your piercer is educated on surface work and able to perform a long-lasting, sustainable piercing for you. Here at Rogue we exclusively use ASTM F-136 Titanium microdermal plates and surface bars from Anatometal – The highest quality jewellery on the market. In addition to this, our head piercers have a combined experience of over 30 years! Our aim is to provide the highest quality service to give you the best possible result.

Aftercare

Aftercare for surface piercings varies greatly from standard aftercare. The main thing to note is that until the surface piercing is fully healed, it is incredibly fragile! The aim is to keep the area relatively clean whilst minimising tugging, pushing, pulling and lifting motions. We recommend cleaning the piercing once or twice a day, choosing either a sterile saline compress or a hot shower. For example, if you shower in the evenings then you will only need to actively clean the piercing using a sterile saline in the mornings!

Sterile Saline is the only thing we recommend using on your piercings. To clean your surface piercing, spray a small amount of saline onto the piercing and let the moisture soak in and soften any crusties you have underneath the top. Take a clean piece of nonwoven gauze or paper towel, and gently use it in a flossing motion underneath the top to remove any crusties. If the crusties don’t want to come away after a few seconds, do not be tempted to get rough with it! Let the crusties be. Once you have finished gently cleaning, dab the area completely dry using a dry piece of nonwoven gauze or paper towel.

Neilmed Saline Spray
Purchase Neilmed Here.Neilmed Sterile Saline Solution

In the shower, it is a simple enough process. Simply allow warm water to run over and underneath your surface piercing to gently wash away any buildup. Again, be super gentle when drying the piercing!

We recommend covering the surface piercing overnight for the first 4 weeks using a disposable plaster. This is to hold the jewellery in place while it heals, as it is quite unstable until the 4 week mark where the skin starts to repair itself. Ensure the jewellery is not touching the sticky part of the plaster! This can cause unnecessary damage to the piercing when you go to remove it.

Surface Piercing Maintenance

Surface piercings do require maintenance in order to look good and stay healthy throughout their lifespan. The main thing to keep in mind is that the piercing generally needs to be actively cleaned through it’s life as skin cells can build up underneat the jewellery top and are tricky to remove! To keep the piercing squeaky clean, the best thing to use is a dental floss pick. After you have a shower, simply take the pick, tuck the floss underneath the surface piercing top, and use it to carefully extract any buildup. As you live with your surface piercing, you will start to get familiar with how often you may need to do this. Some may need cleaning like this every few days, and some may require this more active cleaning only once a month. The most important thing to keep in mind is the less you have to manipulate or move the surface piercing, the more likely it is to last a long time!

An awesome microdermal piercing on our apprentice Jay using an Anatometal 14g threaded Gold Heart!

Surface Piercing Jewellery Options

Aside from the appropriate jewellery style, there is so much you can do with a surface piercing. The main thing to know is that surface work is always 14g/12g threaded. No threadless options here! That is due to the ever-present motion and tugging that your skin experiences that would not be easily combated by a threadless pin. So. What do you want to wear? There are so many options!

Omni or Unidirectional?

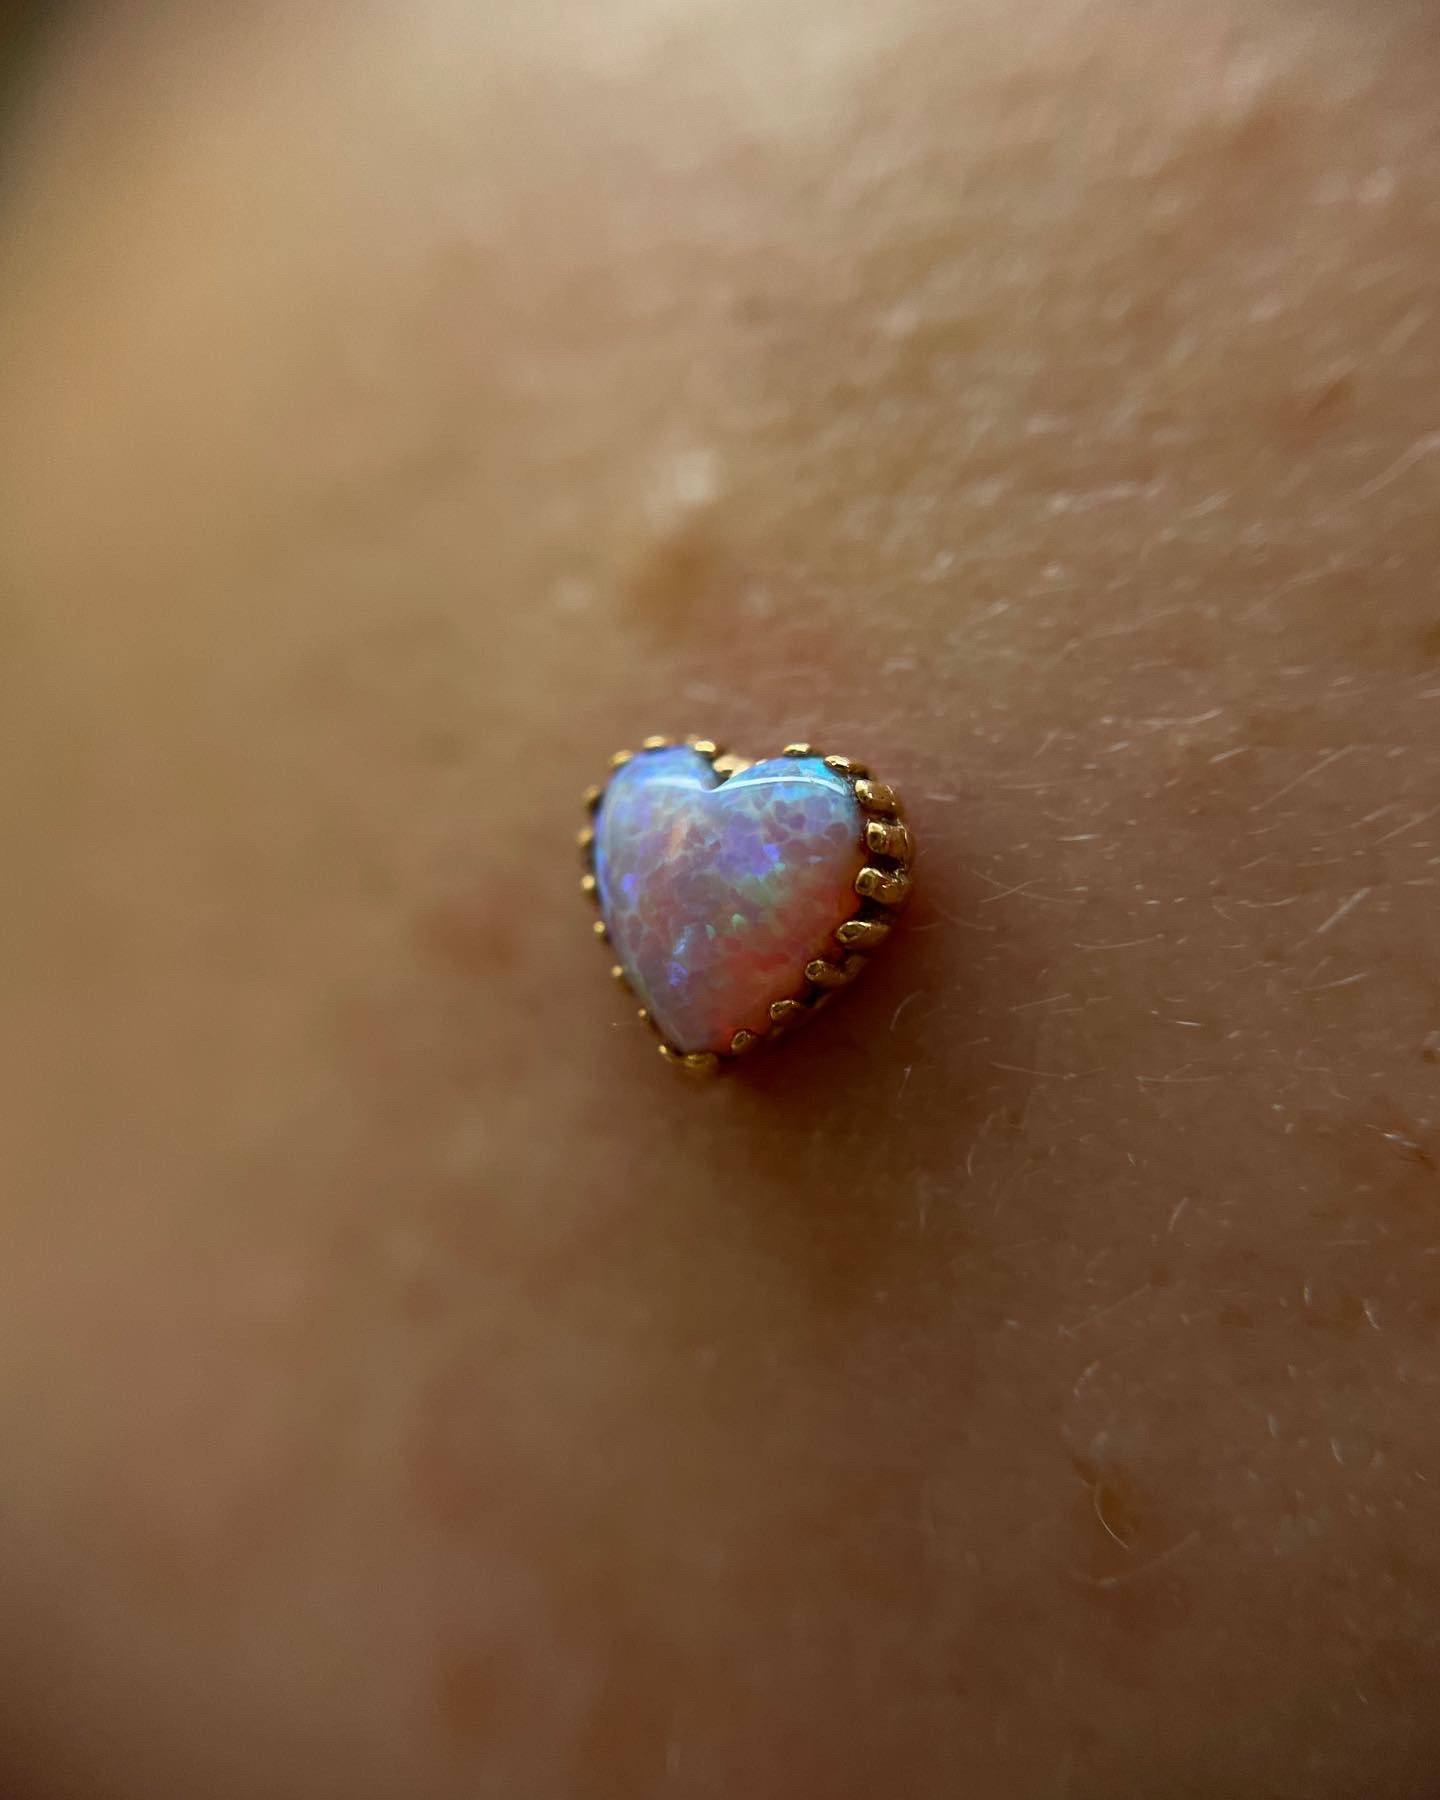
You have two choices in the initial design of your microdermal top. Do you want it to be omnidirectional – Symmetrical in all planes like a disk, dome, or circular design? Or do you want it to be unidirectional – Moons, stars, hearts, and a huge amount of other designs are unidirectional. The main difference is that unidirectional pieces much be pierced with initially, or have the threading checked to ensure that when threaded onto the post that they sit in the desired orientation. For example, if Jay wanted to swap her Anatometal Heart for another design, theres nothing to say that when she puts another asymmetrical piece on top that it won’t thread in upside down! We generally recommend circular or symmetrical pieces if you are looking to upgrade an existing microdermal to avoid this issue.

You can view all of the jewellery appropriate for microdermals here! We also love to custom order jewellery for surface work – Simply email kat@roguepiercing.co.uk to start the process. This way you can guarantee your absolute perfect piece – Choose from a range of thousands of designs!

Thank you for reading this weeks blog! If you want to book in for a surface piercing, click here to book your appointment.

Posted on 1 Comment

Sharing Jewellery

A very common question we get is, ‘You pierced my mum a few months ago, can you reuse her worn jewellery in my piercing?” Sharing body jewellery is a very controversial topic within piercing. Across the board, it is seen as a huge no-no. That being said, there seems to be some discrepancies – Would you wear earrings second-hand? Would you wear something someone else wore in a fresh piercing? Where do plugs, weights and hangers fit into this discussion?

Worn Jewellery Degradation

Jewellery degrades over time. This is true of all things – Entropy comes for us all! This is not necessarily a cause for concern – Titanium labrets age very well and do not tend to cause issues to the wearer. Issues only tend to arise when an attempt is made to reprocess, sterilise, and re-implant the jewellery into a new person. Please read the below figures as they are super interesting!

Brand new Titanium alloy implants, ready for use in medical patients.

We do not have any data specifically from body jewellery (yet!), however Titanium alloy implants from dentistry and osteology are an excellent (and well-studied) source of reference. As you can see, the surface of the implants can become scratched, dented etc through normal wear. This worn surface causes no problems in a healed piercing as the piercing is settled and robust. This is not a surface that should ever come into contact with a fresh piercing, as jewellery is stored appropriately at the studio to avoid damage and a damaged or worn labret is never used in a fresh piercing.

The same Titanium alloy implants after wear in the body. Note the scratches, dents etc.

Biological Contamination

Using a worn post in a fresh piercing is cause for concern- that imperfect surface can scratch and irritate the fresh piercing. The main issue with this though is the fact that it is impossible to fully sterilise this item. The cracks, folds and imperfections can collect biological material which is difficult to remove from the surface. Introducing this into a fresh wound is not hygienic and should not be done by any professional piercer.

Biological debris still clearly present on the implants after cleaning and sterilising.

The above images shows the presence of biological contamination – This can be carbon residues, proteins, biological cells, all of which are permanently adhered to the surface of the implant. Testing has shown that since the surface cannot be completely cleaned, there is a high risk of prion residue. Prions are proteins found on the surface of cells, which can become damaged and misfolded. These prions can then cause Prion diseases such as CJD. Although very rare, the potential existence of prions on the surface of worn jewellery is enough of a risk that we would never reuse worn jewellery in a fresh piercing, especially not across different people.

A common argument I hear is ‘But we’re related!’ This argument is moot. Pathogens, as far as we are aware, do not discriminate between related and unrelated individuals. Even if they did, the contaminants and biological matter would still cause an immune response and opens you up to potential infection.

Equipment Contamination

Jewellery needs to be appropriately sterilised to be used in a fresh piercing. Putting a worn piece of jewellery into our autoclaves would potentially contaminate them with biological matter, which is inappropriate and opens up the risk of spreading contaminants across clients! This risk is obviously low due to strict reprocessing protocols within the studio, but the safest risk is the risk you don’t take in the first place.

Healed Piercings

Healed piercings are generally robust and not as vulnerable to infections from worn jewellery. The issue with this to us as professionals is that spreading biological contaminants between people is always too high of a risk. Biological swabs of worn earrings showed that up to 485 colonies of bacteria can be found on a single piece of jewellery, with species including Staphylococcus and Bacillus. Some species of which are responsible for Staph, MRSA and Meningitis. 1 in 30 people are thought to be asymptomatic carriers of MRSA – Inserting jewellery contaminated with their microbiome, skin cells, sebum and other debris leaves you at risk. For example, if you are sharing stretching jewellery and cause any microtears during the insertion process, this leaves you very vulnerable to infection.

You would hope that worn jewellery being sold online would at least be sterilised, but it is difficult to prove this and many listings simply skirt around the topic of hygiene. The average reseller simply does not have access to the type of machinery required to reprocess and resterilise jewellery. This is a very concerning thing to see from a professional studios point of view as you do not know the health status of the previous wearer, and cannot assume that the jewellery is safe to wear even if the seller claims it is ‘pre-loved, but in great condition!’ This is one of many reasons why we do not use jewellery purchased outside the studio in fresh piercings.

In general, we would recommend extreme caution when purchasing worn or preloved jewellery, even for healed or stretched piercings. The risk is far too high. It is unhygienic – Comparable to wearing someone else’s used underwear or sex toys!

To conclude, we know it’s really tempting to go down the worn jewellery route. High quality jewellery, especially Gold jewellery, weights and hangers, are quite expensive and it can seem like a savvy financial decision to find them second-hand. However, the risk of infection, bloodborne pathogens, and irritation to your piercings is too high for it to be a sensible choice. We always recommend finding your nearest high quality piercing studio and purchasing brand new jewellery for all of your piercings – Your body is worth it! You only ever have one body, so treat it well. High quality does not always mean high cost – Neometal offers a wide range of high quality body jewellery with a very accessible price tag. You can also find Glass jewellery for stretching on our website!

Please don’t hesitate to contact us with any questions or queries you have! Don’t forget to follow us on social media to ensure you don’t miss any posts or announcements.

References

https://www.ncbi.nlm.nih.gov/pmc/articles/PMC6764709/

https://www.mdpi.com/2079-6412/10/9/836/htm

https://journals.lww.com/implantdent/Fulltext/2012/10000/The_Biological_Aging_of_Titanium_Implants.15.aspx

Posted on 1 Comment

Piercings and the Seasons

As Autumn and Winter roll back around, it’s time to talk about how you should protect your piercings through the year! As your environment changes, so does the care your piercings need. This is especially true for exposed piercings such as ear and nose piercings, and definitely true for stretched piercings like lobes and septums! So, how do you care for your piercings in winter?

Winter

Ear Piercings in Winter

Ear piercings are particularly sensitive to Winter – The constant changes in temperature from hot to cold, the mild irritation of hats… There’s a lot for your ear piercings to deal with! The main thing to keep in mind is to keep your ears at a steady temperature, and shield them from abrupt changes in temperature. You may have noticed (if you are particularly perceptive) that when you come in from a cold walk in the wintertime, your ears get pretty red and can even swell a little bit. If not properly protected, this can cause excess swelling on a fresh piercing. We recommend wearing a clean loose buff or winter hat, or other gentle ways of shielding your piercings from the cold, dry air. Make sure you are washing your hats, earmuffs etc regularly as they can be a source of bacteria! Soft, lint-free materials are ideal so as not to risk introducing loose fibres to your piercing. As always, be super careful to avoid snagging your piercings on any hats you do decide to wear! Every pierced person knows that a wooley hat can be the nemesis when you have ear piercings, so do be extra cautious.

Nose Piercings in Winter

The main thing that people can be worried about when caring for new piercings in the wintertime is “What if I get a cold?” The winter is known for having higher rates of cold, flu, and even Covid-19. This not because cold temperatures make viruses more contagious, but because we tend not to properly ventilate our homes and workplaces and spend more time in close physical contact with others. A cold or flu will not make healing your new piercing impossible though, so don’t let that put you off! The main thing to keep in mind is that your piercing is more resiliant than you think. Importantly – Be gentle. Blow your nose as needed, keep your piercing clean and dry, and be patient. The best thing you can do is to avoid getting ill in the first place – Keep your home well-ventilated, wash your hands regularly, and make sure you’re eating a healthy diet with plenty of the necessary vitamins and minerals!

The best way to blow your nose with a fresh piercing is… Carefully.

Stretched Piercings in Winter

We will be focussed on stretched piercings in winter that are more likely to be exposed – Stretched earlobes and stretched septum piercings are the most common! Both are susceptible to that cold, dry air. They are a little more fragile than standard gauges, simply because the tissue is thinner and the jewellery often larger or heavier.

With stretched lobes, the best thing you can do is take the opportunity to downsize the gauge of large stretched lobes during the winter. This means that the piercings are not experiencing as much stress, have a better blood flow, and can settle to become more robust in the long run. The process of downsizing and upsizing in time with the seasons can help to thicken thinning lobes as well! We recommend downsizing by 1-2mm on smaller sizes (10mm-14mm), and 2-4mm for larger sizes (16mm+). For stretched lobes smaller than 10mm, you won’t necessarily see any benefit to downsizing.

Stretched septum piercings can be trickier to maintain in winter. They often wear thick, heavy metal jewellery. Although this looks very cool, this style of jewellery can be impractical in very cold weather. Metal jewellery chills quickly in cold weather, transferring warmth from the inside of your septum to the outside where it quickly radiates away. This heat sink effect is uncomfortable, and at worst could cause damage to your piercing by causing a cold burn. In the winter it is best to swap to more tucked away, subtle jewellery such as simple glass plugs or pincers. These act as much less of a heat sink and are a super comfortable way to wait out the cold months. Something that you might not consider when having a stretched septum in the winter is condensation! The moisture on your breath will condense on the jewellery if it is large enough and can even drip down your face! This is another reason to swap to more invisible jewellery.

Large-gauge septum jewellery can act like a heat sink in the winter and this can be uncomfortable. Ensure you wear light, comfortable jewellery!

Summer

Summer brings its own special considerations to piercings! The main things that can cause issues are the heat, humidity, and the changes in our lifestyle such as flying and swimming.

Heat and Humidity

The main things that can cause irritation to piercings in the summer are heat and humidity. On extra hot days, we can often expect a bit more swelling especially on very fresh piercings. The best way to combat this is to keep cool, hydrated, and avoid overexerting yourself. Drinking plenty of fresh, cool water is not only good for you, but good for your piercings! If you know you are safe to do so, taking an anti-inflammatory medication such as paracetamol or ibuprofen is a nice way to minimise your swelling. Speak to your doctor if you have any questions or concerns about this though.

Flying

Summer holidays are the most popular time for international flying! Over 100,000 international flights occur in the 6 weeks of the holidays, so you can imagine how many new piercings there are flying across the world at any one moment! The main thing to keep in mind with flying is that pressure change. We all know that you can swell a little bit when flying, and that is definitely true with new piercings. This is not a reason not to get pierced, but it is important that your piercer is informed of any flying, international travel, holidays etc. This means that we can add an extra millimetre or two of swelling room to account for this.

If we know you’re flying, we’ll add a smigeon of extra swelling room!

Swimming

The most important thing that you need to consider when getting a new piercing is that you cannot safely swim for 4 weeks afterwards. That means no swimming in the sea, lakes, swimming pools, saunas, jacuzzi or any other bodies of water. And no, just because the sea is salt water doesn’t make it safe to swim in! In a single drop of seawater, there can be over 190 individual species of bacteria. Once you are past the 4 week mark, you can slowly start to swim again! Make sure you rinse your piercing with clean tap water or bottled water afterwards, and dab dry to avoid leaving your piercings waterlogged.

Alcohol

Summer means BBQ season, and BBQ season means the opportunity to enjoy an alcoholic beverage (or four!) with friends. We cannot pierce you if you are under the influence of alcohol, or have had even one unit of alcohol the day of your appointment. Please keep this in mind when booking! Alcohol can thin the blood, which means you can expect a bit of extra swelling and crustiness if you drink the week after you get your piercing. This is nothing to be concerned about, so just clean your piercings as normal. When you are intoxicated, it’s more likely that you will accidentally snag or knock your piercings. It’s all part of being a human being! Don’t punish yourself – Just take the time to look after them when you are feeling back to normal.

If you are struggling with alcohol, please look into support in your area.

Sunburn

It is always really important to protect your skin, however when you have a fresh piercing it is extra important. Burnt skin is damaged skin, which leaves your piercings exposed and vulnerable to infection. Not only that, but a sunburn can slow the healing process, and can even irritate healed piercings! We don’t recommend applying sunscreen to a fresh piercing as the chemicals can cause irritation, so the best thing you can do is cover your piercings in strong sunlight. The main methods of doing so are staying out of the sun, wearing long and loose clothing, and wearing a wide-brimmed sunhat!

Protect your skin, protect your piercings, protect your health!

So there you have it, some of the main ways that the seasons will impact your healing piercings! With winter coming, the main things to remember are: Be careful with winter clothing, and make sure you keep yourself as healthy as is possible for you!

If you have any questions, just get in touch.

Make sure you follow us on social media to see our piercing work and keep up to date with everything that happens at Rogue!

Posted on Leave a comment

A Summer Overview

Today I think everyone in Nottingham woke up and noticed the distinct change in the air. Autumn is coming… Folks are prepping for college, university, or thanking the stars that the Primary and Secondary school summer holidays are coming to an end. So, what was summer like at Rogue? Today we’re taking a look back at the last three months!

Excellent Piercings

The last three months have been awesome in terms of piercing. Not only have we used more stunning Gold jewellery than we ever thought possible, but we have also been overwhelmed with the sheer number of amazing people booking in for intimate work of all levels. It’s been a whirlwind, but it’s been awesome. Here are some of our favourites!

Custom Orders

The custom orders in recent months have been absolutely insane. We’re absolutely overwhelmed by the sheer creativity of our clients. Paired with the assistance of an expert team and myself, we’ve been creating some genuinely amazing jewellery! We love BVLA because you can genuinely find their designs nowhere else.

Fun at Work!

The summer is the best time – We have done so many fun things together as a team. The main highlight is always the Summer party, where we spend a long weekend swimming and partying with friends. Not only this, but we have been working on expanding our experiences. For example, this summer Gemma and I have experienced suspension hooks for the very first time. It’s an incomparable experience that really changes your perspective on the human processing of sensation. This is something we might offer to the public in the future…

As a heads up, the below slideshow contains photos from this day which include blood!

The Heatwave!

And then it was July and August in a blink of an eye! We had not one, but 5 days where the temperatures topped 40. It was absolutely incredible. We have never experienced anything like it before in the UK! Nottingham seemed to grind to a halt, and we indeed closed the studio for a day. We were so glad to be back open though, as it was actually cooler at Rogue than at any of our respective homes!

Looking Forward

As Autumn slowly arrives we’re looking towards the future with vague optimism. I’m going back to university next month, the team are learning and growing, and Rogue is looking better than it ever has! We can’t wait to see where the next season takes us. While I have your attention, I may as well let you know what the next custom order deadlines for each brand are going to be!

  • BVLA – November 26th
  • Anatometal – September 10th
  • Neometal – September 1st
  • Gorilla Glass – September 2nd

As always, contact me at kat@roguepiercing.co.uk to organise your custom orders! I always recommend having a scroll through the brands website and social media to get some ideas, and I can work from there.

See you next week for another blog!

-Kat

Contact us on social media, or via email!

Posted on Leave a comment

Piercing Apprenticeship QnA

Today I’ll be answering all of your questions about piercing apprenticeships! These questions were taken via our instagram, so make sure you follow us there so you don’t miss anything!

We have started a series on apprenticeships as this is something we are asked about all the time! Click here to read all of them.

How long does it take? How much does it cost?

A good apprenticeship is between 2 and 3 years long. Anything shorter than two years is dangerously short and will not give you the education that you need! You should never be charged for an apprenticeship -They should be free. You should expect to be financially compensated for your time.

What do the first few months of an apprenticeship look like?

The first few months of an apprenticeship are pretty dull! The main task is training the new apprentice to be able to work safely in a new environment. Bloodborne pathogens training and first aid must be completed, alongside learning how to handle contaminated medical waste, how to handle sterile stock, how to reprocess tools, and how to general work to a high hygiene standard. The first few months are also dedicated to familiarising the new apprentice to jewellery – What sizes go where, what conversions between fractional inches and millimetres are, how to use calipers, how to measure jewellery, what brands we stock and what each brand offers! You shouldn’t expect to even pick up a needle until you are a good few months into your apprenticeship, and may not pierce a human being until the 5-6 month mark.

How common is being paid for your apprenticeship?

It is unfortunately not so common in the UK to be paid for your apprenticeship. That being said, this should not be the standard as everyone should be fairly compensated for their time. There is a movement within high quality studios to abolish the practice of an unpaid apprenticeship, and this is something to be fully supported.

How far should you travel for an apprenticeship?

It is not uncommon to up sticks and move cross-country for the right opportunity! Consider this – Most people do not live in a town or city with a top university, and so most people move out of home in order to receive their education. You would have to be very lucky to find a high quality apprenticeship on your doorstep in your hometown. For example, we know multiple piercers who have moved across the United States or across the UK for the right opportunity – Some who have even travelled thousands of miles from another country to start their careers. If possible, don’t restrict yourself to studios within an easy commute of where you currently live. There are many potential apprentices who are willing to uproot and move at the drop of a hat.

What is the split like between working hours and free time?

Most apprenticeships are between 20-40 hours a week. You might be given extra reading to do in your spare time, or small pieces of homework to complete, but you should not be working more than a full-time job would ask of you! Apprentices should follow the same labour laws as any other job.

How old is the average apprentice?

The average piercer starts their apprenticeship when they are between 19 and 22 years old. Some start younger, however you should be at least 18 or older to start a safe apprenticeship. Being offered an apprenticeship as a minor is a major red flag in the modern piercing industry.

Is it possible to learn the art of piercing even though you don’t want a full on career out of it?

This is a tricky question to answer. The short answer is that you wouldn’t trust a part-time dentist or doctor.

The long answer would be: Piercing, like all careers, deserves your full and undivided attention in order for you to be skilled, safe and successful. Whilst it is possible to learn piercing and not pursue it once your apprenticeship is finished, the snagging point is that you aren’t fully grasping how much of a career and lifestyle rolled into one being a piercer is. The best piercers are those who have dedicated their lives to the industry and cannot see a fulfilling life without piercing being a major part of it. My question to you is: Why would you want to learn to pierce and not fully embrace every aspect of it?

I’ve seen piercing places offering piercing courses, is this a good step towards getting an apprenticeship?

Absolutely not! Piercing courses teach outdated and dangerous techniques when it comes to both safety and the piercing process itself. A good mentor would absolutely prefer to take on a blank slate rather than have to retrain someone out of sneaky bad habits. Piercing courses are often predatory, aiming to take advantage of those who are struggling to find a good apprenticeship. Do not fall foul of these.

What advice would you give for someone older (30+) looking to become a piercer?

I would say that it is never too late! That being said, I will admit that your chances of getting an apprenticeship do diminish with every passing year. Piercing is unfortunately often the realm of the young, and those piercers who are 30+ are often reaching the peaks of their skill and career and are usually considering taking an apprentice on themselves. To start so late can often leave you at a disadvantage, as disappointing as that may be to hear. Try and expand your expectations – Would working counter staff fulfil what you want to achieve?

Piercing is different everywhere. How do you know someone is doing it properly?

We have a whole blog on how to spot a quality studio. The best way to find a studio that is working to high standards is to look into the UKAPP or APP – Member studios have to meet minimum standards of safety and hygiene. That being said, there are many excellent studios who choose not to be members for whatever reason. Ensure your chosen piercer is working safely, using modern techniques, up-to-date aftercare advice, and appropriate jewellery. For example, you do not want to learn from someone offering tongue scoop piercings or surface piercings using curved barbells, or from someone who is using butterfly backs or externally threaded jewellery.

So there you have it! Some answers to your burning apprenticeship questions. As a note, we are not currently looking for an apprentice and will not be accepting any applications for an apprenticeship for the foreseeable future! However we are more than happy to help you, so get in touch if you have any questions.

Posted on Leave a comment

How to Plan Piercing Curations

Today we’ll be discussing a common question – ‘I want to curate my piercings, but I have absolutely no idea how to start!’ We will cover the concept of a piercing curation, how to start planning them, and what to expect from the process!

This White Gold curation is one of our favourites. Everything is custom ordered to fit our clients unique taste.

What is a Curation?

A curation is a thoughtful collection of piercings that were high-quality jewellery in a cohesive style. Some curations are themed, some are more eclectic, but what connects each curation is a singular line of thought that expresses your personal style.

Some people say that curations are only for ears, and should only be done in solid Gold. This is absolutely not the case! As in my previous definition, there is zero mention of a sky-high budget or fancy ears at all. A curation is simply a considerate collection of good jewellery, worn in well-placed piercings. Our most common curations are actually produced in Titanium! Curations can involve the ears, the face, or the entire body. It all depends on what you want from your curation.

This dinosaur themed curation is super cute!

How do I plan a Curation?

The best way to plan a curation is to first see what you already have, and look at your personal style and what you want from your curation. The best way to do this is to book in for a jewellery consultation with us, so that we can provide you with an expert curation experience.

There are so many questions to ask! Do you have lots of existing piercings? Do you have a few piercings? Are they well-pierced, well-placed, or would you be open to removing or repiercing a few of them to improve the overall effect? Another major thing to consider is what you want to see from your curation. You can scroll instagram for hours and hours looking at other peoples collections, but a curation is a truly personal process. Do you prefer Gold, or Titanium? Do you like Yellow, White or Rose Gold? Do you like the look of anodised Titanium? Do you like gemstones, or no gemstones? If yes, then which gemstones or gem colour schemes do you like? Do you like a more masculine look, or a more feminine look? Are you a fan of big, chunky jewellery (our favourites!) or do you like a smaller, more dainty pieces? This all needs to be considered when planning out a full curation.

Noses are a great place to start your curation. When it comes to the centre of your face, why not wear beautiful jewellery?

As important as what you do like, is what you don’t like! We love to see what you don’t like – What doesn’t fit your style. Showing us both what you do and don’t want to wear gives us a really good idea of where to go with your curation.

Once we have a rough idea of what you would like, we can go onto picking out individual piercings and individual jewellery. The best thing to do is to plan out a couple of statement pieces, and then work around them with complementary items. Centring your curation on a handful of piercings is a really nice way to ground the look. The best thing to do next is to head to the websites of our jewellery companies and have a good old scroll! We perform curations using BVLA, Anatometal, and Neometal. Keep in mind that every single piece of jewellery is handmade to your specifications – Choose the gold colour, the gemstones, the size, everything! If you are unsure as to what exactly you’d like to wear, Kat can give you a huge range of suggestions that you can start to choose from.

This sounds like a lot, but honestly it is an incredibly easy process when you have the support of the Rogue team!

Getting creative with Titanium is a fab way to get a cohesive, thoughtful piercing curation.

Getting a Curation

We think the most exciting part of the piercing curation is actually ordering, receiving and installing the jewellery. Depending on the jewellery maker, this can take anywhere from 6 weeks to 6+ months to arrive. When it comes to curations though, the wait is always worth it. Having your perfect jewellery takes time, but that time will pass anyway!

Depending on the jewellery you have ordered, we will sometimes recommend getting the healing process started before your final jewellery arrives. This is especially important with longer-healing piercings such as daiths, rooks, and cheek piercings. However sometimes we recommend waiting until your final jewellery has arrived so that we can place it absolutely perfectly! This is especially the case when it comes to big, chunky ends or unique placements. It all depends on what you have ordered and what your end goal is.

Lip piercing curations are an absolute favourite of ours. We would love to do more of them!

With curations, it definitely falls into the ‘Rome wasn’t built in a day!’ category! Depending on which jewellery brands you want to wear, wether the gemstones are semi-precious or precious or synthetic, and a huge amount of variables can impact the pricing. Some curations can range between £300-£15,000. We absolutely work within more limited budgets – Titanium curations can be so neat and beautiful and can be super affordable too. Even plain Titanium beads can look impactful when skilfully used! The main thing to keep in mind is that a piercing curation is a patience game – You don’t need to buy everything all in one go, or even in one year. Some clients build collections over the course of many years and this is often the best way to do it!

We have a full blog post detailing the custom order process which you can read here!

So there you have it, a full rundown of curations. How they work, how you go about it, and what to expect. Plus links to other blogs where you can continue to learn!

If you would like to book in for a jewellery consultation with Kat, head to our booking system. We can also do remote curations via email! Head to our instagram for a whole lot of inspiration.

-Kat

Posted on 3 Comments

Repiercing 101

We are often asked if it is possible to pierce in the same spot as an old piercing. There seems to be some misinformation floating around that says that if you have had a piercing in X location, you can never have a repiercing in the same place! This is not the case and we will explain why, but also talk about which conditions need to be met in order for your repierce to go smoothly.

What Is Scar Tissue?

Your piercing scar is made of scar tissue. Scars are a natural and unavoidable product of your wound healing response – There is little you can do to prevent the growth of scar tissue! Healing a piercing is a careful balance of healing a scar in a certain way to support jewellery. A piercing is a wound, after all. That scar tissue is avascular (has no blood vessels) and is made mostly of collagen. The collagen is not assembled into the organised layers that undamaged skin is, but is quite jumbled and rigid. This is why you might feel a little solid ‘lump’ where your old piercing used to be – That is the scar tissue that formed the piercing channel of your old piercing. As your scar matures, the amount of collagen drops by as much as 20% and you can feel the scar get softer and softer, until you might barely even notice it. This is what we are waiting for when we ask you to remove your jewellery and wait for a re-piercing!

Everyone heals at a different rate. There is no set time frame for when your old piercing has settled enough to repierce. Interestingly, it may take longer for young people to be ready for a repierce as our immune systems are too good at healing! The re-epithelialisation stage of wound healing is when the collagen for the scar tissue is produced. The younger you are, the more energetic this response is and the more collagen you produce. The more collagen you produce, the heavier the scar tissue will be and the longer it will take to settle and be ready to repierce. People over the age of 50 tend to scar less, as their immune response is lower and they do not undergo such an overproduction of collagen. You can read more about the healing process here!

When Am I Ready To Repierce?

This is different for everybody. The best way to know if you are ready to be pierced in the same spot is to head to your piercer and allow them to assess the area. We know what to look for in a scar! Is it hard and granular still, or has it softened enough to repierce?

Repiercing before you are ready can cause issues. Like I mentioned earlier, scar tissue is avascular. This means that if we repierce before the scar tissue has diminished, then there will likely be less blood flow and nutrients to the area which can significantly extend the healing time of your repiercing. Not only would your healing time be extended, but piercing through hard scar tissue is not fun! If the old piercing fistula is still open, you can also have issues where the new and old piercing channels interact and cause issues with draining of fluids.

As a general rule, we recommend waiting:

  • At least 8 weeks to repierce soft tissue like a lobe or navel piercing.
  • At least 12 weeks before repiercing ‘soft cartilage’ like a nose or septum piercing.
  • At least 6 months before repiercing hard cartilage, such as daith, helix or conch piercings.

This is not a hard and fast rule though. Everyone is different! Check in with your piercer if you are unsure, and always wait longer than you think you need to. There is no rush to repierce! A good piercer will produce a great piercing that will last you the rest of your life.

A beautifully settled and repierced second lobe piercing. When done well, you wouldn’t even know that this has been pierced before!

Taking Care of Your Piercing Scar

After removing your old piercing, you shouldn’t need to do anything special to it. No special cleaning, no lotions and potions. The piercing itself will shrink down and seal over fairly quickly, and needs no special care even if the piercing was very new when you removed it.

If your scarring is particularly obtrusive, we recommend that after you remove your jewellery you begin a daily routine of very gentle massage. Use a non-scented natural oil such as Jojoba oil to lubricate the skin, and gently massage the scarring between thumb and forefinger. This can effect how the scar remodels over time, and can break up the scar into softer, more pliable, tissue. There is not a huge amount of evidence (besides anecdotal evidence, which should always be taken with a grain of salt!) that scar massage is super effective, but keeping the area moisturised and stimulating blood flow will not hurt you either. If you have excessive scarring, like in keloid formation or large hypertrophic scarring, then a trip to the dermatologist wouldn’t go amiss. There are lots of things modern medicine has to offer such as laser, silicone patching, corticosteroid injections, and lots of other treatments that can soften and minimise scarring. A standard repiercing shouldn’t need all this special attention though! Time is the greatest healer of all.

As a side note, there is no discount in piercing fee whether it be a new piercing or a repierce. We use exactly the same tools and it takes exactly the same amount of time as a fresh piercing!

If you have any questions, don’t hesitate to get in touch via our instagram or email!

Citations

Bond, J.S., Duncan, J.A.L., Sattar, A., Boanas, A., Mason, T., OʼKane, S. and Ferguson, M.W.J. (2008). Maturation of the Human Scar: An Observational Study. Plastic and Reconstructive Surgery, [online] 121(5), pp.1650–1658. Available at: https://journals.lww.com/plasreconsurg/Abstract/2008/05000/Maturation_of_the_Human_Scar__An_Observational.19.aspx [Accessed 11 Nov. 2021].

‌

Posted on 3 Comments

Tongue Piercings 101

Tongue piercings are very popular piercings – One of our most popular oral piercings aside from philtrum piercings! In today’s blog I will give an overview of the tongue piercing, the anatomy of the tongue, the anatomical limitations of this piercing and some of the red flag tongue piercing options which should absolutely be avoided.

Tongue Anatomy

The tongue is an incredibly mobile and active collection of muscles. There are a few major parts to note that are important to piercing. 

  1. The Two Major Muscle Groupings

All the muscles of the tongue are paired structures, split in the middle by the lingual septum. The intrinsic muscles are responsible for changing the shape of the tongue and controlling its movement. Working together, the longitudinal, transverse and vertical intrinsic muscles control the movement of your tongue. They can do this by working in isolation, or by working together depending on the motion required. These muscles should not be impeded by a piercing, or there can be serious consequences for the mobility of your tongue and your ability to eat and speak. We will get to that later…

  1. The Median Lingual Septum

The Lingual Septum is the thin, fibrous membrane that separates the paired muscles either side. Although this is an internal structure, you can locate it by looking out for the longitudinal midline groove that runs down the middle of your tongue. A traditional tongue piercing sits somewhere along this midline groove, and passes through the lingual septum. Like with a nasal septum, piercing through the thinnest section of membrane makes your tongue piercing much easier to heal and reduces your risk of problems. The existence of this lingual septum is what makes traditional center-line tongue piercings so safe. 

  1. Major Blood Vessels

The major blood vessel feeding the tongue is called the Lingual Artery. Because the tongue is such a thirsty and active muscle grouping, the lingual artery is large and branches out into lots of smaller vessels which make sure the tongue is always well fed with oxygen. The most important branch of the lingual artery is the Deep Lingual Branch. This is the largest branch of the lingual artery, and passes through the base of the body of the tongue. If you lift your tongue, you may be able to see it sitting just behind your lingual frenulum (where a tongue web piercing would go). Sometimes you will have one central branch, however some people have two either side. Some people have two that cross over in the middle. This is all really important information that a piercer should be looking for before they pierce your tongue. If we cannot see it, or it crosses over itself base of the tongue, we will normally discourage you from getting this piercing. The Lingual Artery feeds directly from the Carotid Artery – That’s a direct bloodflow from your heart. This is a serious business! 

The Healing Process

Tongue piercings are incredibly low-maintenance and heal very quickly. Here you can find an overview of their aftercare.

You want to clean your tongue piercing a maximum of 5 times a day with an alcohol-free mouthwash for the first 4 weeks. These 5 times are generally after brushing your teeth in the morning and evening, and after your three main meals. If you need to snack, smoke, or have sexual contact using your mouth (including kissing!) try and group those in with these 5 mouthwashes, however if you need to do them at other times of the day we recommend simply rinsing your mouth out with water afterwards. 

Aside from this cleaning, we recommend leaving your new piercing alone entirely! No touching or fiddling, or fidgeting with your jewellery. Don’t get in the habit of playing with it! It’s best to avoid super spicy or hot foods for the first 4 weeks, but aside from this you are welcome to eat whatever you find appetising and is most comfortable for you.

Downsizing is the most important part of maintaining your oral health. After your swelling goes down, you need a shorter bar installing to avoid harming your mouth. This is usually after the first 7-10 days. After this downsize, you may need another at the 3 month mark so do keep in touch with your piercer. If you do nothing else with your tongue piercing, get it downsized!

Types of Tongue Piercing

  1. The Traditional Tongue Piercing 
You can’t miss this one! You can stretch most piercings, including the tongue. This is a great example of a central, midline tongue piercing though, even if it a bit more nontraditional!

The traditional tongue piercing is the classic tongue piercing everybody thinks about when the words ‘tongue piercing’ are mentioned. It’s placed along the midline of the tongue, behind the apex or ‘tip’ of the tongue. The most important part of this placement is that it should not be so close to the tip of the tongue that it risks coming in contact with your teeth, or the gum-line on the back of your teeth. On the other hand, it should not be so far back that it irritates the lingual frenulum or digs into the bottom of the tongue. You can have one midline tongue piercing, or multiple one behind the other depending on your anatomy.

These tongue piercings are relatively simple to have and heal – You are fully healed within 8 weeks! 

  1. Paired Vertical Tongue Piercings

The second most popular type of tongue piercing are the paired vertical tongue piercings. Otherwise known as ‘venom’ piercings, these are sets of two tongue piercings that sit either side of the midline of the tongue. These are super anatomy dependent and are much more complex piercings to get than the standard, so pick your piercer very carefully. Paired tongue piercings take slightly longer to fully heal as they do pass through the actual muscles of the tongue as opposed to just the lingual septum. You are fully healed within 12 weeks, which is still relatively quick for the human body! Paired tongue piercings are the best way to get the look of the piercings mentioned below in a safe way.

Paired Vertical tongue piercings are both adorable and very safe. They are anatomy dependent though, so do have your anatomy checked by a skilled piercer. This set was done by the wonderful Kitty of Holier Than Thou – We cannot recommend their studio enough if you are in the Manchester region.
  1. Unsafe Tongue Piercings

For some reason, tongues seem to be the current place to get unsafe piercings. There are two major styles of tongue piercing to avoid, and they will be discussed below. Please bear in mind that some of the photos below may be graphic, but it is important to know how seriously dangerous these piercings can be and appreciate the immense damage they can cause to your body. 

As discussed above, tongue piercings are no joke. The tongue is highly innervated and has large blood supplies to it which means any issue can soon become medically critical. So why are some piercers still offering these two styles of piercing?

Snake Eye Piercings

You can already see the pressure this snake-eyes piercing is putting on the tongue. Rejection is unfortunately a matter of time.

Snake eye piercings are piercings that pass horizontally through the apex, or tip of the tongue. They either use a straight or curved barbell. Neither style of jewellery makes this a safe, sane or sensible piercing. As previously discussed, the tongue is made of paired symmetrical muscles that need to be able to work independently in order for you to have full movement of your tongue. 

A piercing passing through both sides of your tongue horizontally binds these two muscle groupings together and can cause serious damage. Every time you eat, move your tongue or speak, these two muscle groups are fighting against and pulling on your jewellery. This means it is only a matter of time before the jewellery is rejected, causing permanent splitting and scarring of the tissue. 

The other major issue with Snake Eye piercings is that the tip of your tongue is constantly touching your teeth or gums. Pay attention to wear your tongue is sat at rest – it is tucked up behind your front teeth. Try talking for a second – the tip of your tongue flicks against the back of your teeth to form the ‘dental’ and ‘interdental’ phonetic sounds. Imagine having a piece of jewellery in that part of your tongue! It spells disaster for the health of your teeth and gums. Gum recession and tooth loss are irreparable so keep this in mind before choosing to have this unsafe piercing.

Surface Tongue Piercings

It’s ridiculous to choose such a dangerous piercing, when paired vertical tongue piercings look identical.

Surface tongue piercings, or tongue ‘scoop’ piercings, are just as bad as they sound. These are piercings that pass horizontally through the surface of the tongue in the same way as a surface tragus or other surface piercing. The main issues with tongue scoop piercings are the same as with snake-eyes. Rejection, splitting, and scarring. 

Surface piercings can be successful in areas of low movement if you understand that the definition of a ‘successful’ surface piercing is 6-12 months. The tongue is not a low moment area. It is one of the most motile parts of your body. This, along with the binding of two muscle groups together, means that rejection is guaranteed in as little as a week. 

The body of the tongue is full of nerves – that is what allows you to control your tongue alongside tasting food. Surface tongue piercings risk severing these nerves, leaving you with loss of sensation at best, and paralysis at worst. It is simply not worth the risk.

It is not often we take such a strong stance on ‘good vs bad’ piercers. We would like to believe that all piercers are working for the common good of their clients, however in this case we take a very black-and-white stance. There is no such thing as a good piercer who offers these two types of tongue piercing. If your piercer offers these piercings, they are neither good piercers, nor safe piercers, nor do they have your safety and quality of life in mind. 

So there you have it! A good overview of tongue piercings. We love them here at Rogue, and are proud to offer them in a safe and skilled way. 

If you have any questions, then you are welcome to contact us via our instagram, or email us!

See you next week for another piercings 101!

Posted on 2 Comments

Piercing Retainer 101

Now that school is back in session and everyone is back in work, we are being asked ‘what is the best way to hide my piercing?’ We also frequently get asked what to wear when undertaking medical procedures such as MRIs and surgery. There are a few different options to consider in terms of piercing retainer, and we will discuss them today.

The MRI Machine was invented in Nottingham. One of our little claims to fame!

Do I Even Need a Retainer?

The biggest thing to consider is, do I actually need a retainer in the first place? There are a few things to consider in this case. Firstly, how old is your piercing? A well-healed piercing can usually sustain itself without jewellery for a short while, such as for the duration of an MRI which usually lasts between 15 and 90 minutes. For MRIs and other short procedures, it is recommended to remove your jewellery just before the procedure, and reinsert it as promptly as possible afterwards. You may need an insertion tool or taper to help you do this, which we recommend buying in advance. If you are not confident in changing or reinserting your jewellery yourself and have a medical procedure coming up then please get in touch! We are more than happy to help you remove and reinsert your jewellery absolutely free of charge in the case of medical procedures. You do need to book this, so give us a phone call to avoid paying the checkup fee.

If your piercing is still relatively young, or is in a placement that closes more quickly such as an oral piercing, it is best to choose a retainer in advance of when you need it.

The Gold Standard Retainer

Even though our jewellery is ASTM F-136 Titanium or solid 14k and 18k Gold which are all totally MRI safe, a lot of medical practitioners will ask you to remove your jewellery before procedures regardless. If you feel confident in doing so, you can self-advocate to your MRI technician and medical team. We are happy to provide you with the paperwork required to prove your jewellery is MRI safe if you need it. However if you do need to remove your jewellery, for example if your procedure is on your head or face, then do consider a retainer. If your procedure is longer than an hour, we’d recommend purchasing glass jewellery as a retainer. Glass is the perfect retainer piece, being inert and transparent so as not to leave an afterimage on any x-rays or imaging work you have done. Lead-free Borosilicate Glass is also totally nonporous and body safe – It is truly the gold standard. If you have a procedure coming up, we highly recommend contacting us to organise ordering glass retainers for any piercings that you are worried may close. 

Glass is one of the best materials for body piercing and is usually the material of choice for stretching amongst professional piercers, although you do not need to stretch your piercings to wear it. Glass jewellery is available in every size and thickness! One of the biggest advantages of glass for piercing jewellery is its non-porous, extremely smooth surface. This allows for easy and frictionless insertion and removal of the jewellery. It also means that the jewellery can be easily cleaned and will not collect bacteria as with a porous structure such as acrylic, plastic or wood.

Aside from being great for medical reasons, glass is also a handy way of concealing piercings for work or school. Glass is shiny though, so do consider Neometal ‘Freckle’ Discs if you want something extremely subtle. 

Glass jewellery is not only beautiful, but a perfect material to wear as a retainer.

The Unsafe Piercing Retainer

Retainers, although intended for short term wear, should still be implant-grade and body safe. Anything that is inserted into the body needs to be safe to wear. So where does plastic jewellery stand? Plastic jewellery is pervasive in the piercing industry. Whether that be under specific brand names, in the form of flexible a plastic ‘retainer’ or classic acrylic jewellery, plastic jewellery is everywhere. So why do we not stock it here at Rogue? What is the issue with flexible plastic jewellery?

Here you can see a plastic retainer under an SEM electron microscope. Bacteria will live and grow very quickly in this cozy matrix of holes. Your body will be permanently irritated by the rough texture, too.

The main issue with plastic jewellery is that plastic is porous and rough in texture, and made from unregulated mystery polymers. When something is porous, it means that it is covered in small holes that allow liquids to pass through. This means that bacteria and other nasties have crevices in which to grow. This biofilm can cause severe irritation to a piercing, alongside causing nasty odours and excessive crusting. The roughness of the texture of plastic also means that it is constantly rubbing the inside of your piercing like sandpaper. This can cause irritation bumps, scar tissue formation, and can significantly damage the inside of your piercing. There is little research into plastics that act as an implant such as in piercings, however a study performed in 2016 showed that plastic or teflon jewellery was found to carry up to ten times more bacteria and biofilm than the same type of jewellery made from highly-polished Titanium, (Borges et al, 2016). This study also viewed the different jewellery under a microscope to visualise the difference in surface finish and bacterial buildup (yummy!).

There is so much more biofilm present on the plastic jewellery – This porous surface allows buildup and irritation.

All this aside, the number one reason why Rogue does not stock plastic jewellery is because we simply do not know what it is made from. There are seven main categories of plastic, however there are thousands of different plastic polymers with their own composition and characteristics. No plastic jewellery manufacturer is willing to divulge the exact plastics they use. With every single piece of jewellery we stock, we receive certification that it is A) What it says it is, and B) Made from a material proven to be implant-grade and safe to wear. We simply do not have this information for plastic jewellery. Some plastics have been shown to release carcinogenic or toxic compounds at body temperature, such as when ingested. All plastic jewellery degrades over time, and can cause issues at any point. It’s our prerogative to provide our clients with safe jewellery that can last a lifetime, which is why plastic is not offered at Rogue. If you do have plastic jewellery as a piercing retainer, do use it as a last resort and remember that it is only recommended to wear for a maximum of 8 hours before being discarded. Plastic is not at all made for long-term wear.

The main takeaways from this are that we are here to help! If you cannot get jewellery back in after a procedure, we can help you. If you need a piercing retainer for long-term wear then we can order items in for you too. We just want to see happy and healthy piercings out there! 

Contact Us

Instagram

hello@roguepiercing.co.uk (General Enquiries)

kat@roguepiercing.co.uk (Custom orders, Jewellery Enquiries.)

References

Borges, L.P., Ferreira-Filho, J.C.C., Martins, J.M., Alves, C.V., Santiago, B.M. and Valença, A.M.G. (2016). In VitroAdherence of Oral Bacteria to Different Types of Tongue Piercings. The Scientific World Journal, [online] 2016, pp.1–6. Available at: https://www.hindawi.com/journals/tswj/2016/7349371/ [Accessed 23 Sep. 2021].

‌

Posted on 6 Comments

Nose Piercings 101

Nose piercings are incredibly popular amongst all ages, all genders, all walks of life. They can be part of self expression, cultural tradition, or self-discovery. We absolutely adore a nose piercing. Here you’ll find an overview of nose piercings, their aftercare, and what to expect in terms of healing and jewellery options!

Placement

There are many places on the nose that can be pierced. Not all are easy, not all are to everyone’s taste, but we love how much of a blank canvas the nose is.

Traditional nose piercings are exactly what most people imagine when thinking about a nose piercing. They sit about 8mm from the edge of the nose, below the nasal crease. Some people will want their nose piercings directly on the nasal crease, but we do not recommend this as it is the thickest part of the cartilage, where two cartilage plates meet. This means that ‘nasal crease’ piercings can be very tricky to heal. Traditional nose piercings are the most common type, and have the largest range of jewellery choices once healed.

Here are my nostrils! All BVLA, all the time.

High Nostril piercings are their own subset of nose piercings, and are easily the most tricky to heal. High nostril piercings are defined as any nose piercing placed above the nasal crease. Some piercers will split them into two secondary categories depending on their height. For example, we would define my (Kat) nostrils as ‘mid-nostrils’ even though technically by our own definition they are high nostrils. High nostrils, when done correctly by a skilled piercer, can be practically against the bone of the nose bridge. High nostrils are not to be taken on lightly and can take upwards of 9-12 months to fully heal. Aiden is incredibly experienced with high nostrils, and has done many sets for other piercers too!

This set of high nostrils was done on the lovely Gemma of Pierce of Art! You can see them in comparison to a set of traditional nostrils below with the black jewellery.

Mantis piercings are a relatively new trend in nose piercings. Otherwise known as ‘forward facing nostrils,’ these are nose piercings that pass through the front or tip of the nose. Mantis piercings can be a trickier heal and are complex to mark and pierce. It is so easy for a tiny discrepancy in angle or placement to throw the whole thing. We would love to do more forward facing nostril piercings if the right client chose them!

Jewellery Choices

Nose piercings have a few options in terms of jewellery. Some are good for fresh piercings, some are good for healed piercings, and some are not great for piercings in general!

Studs

Studs, or flat-back labrets, are the perfect style of jewellery to start nose piercings with. The straight bar means than any excess length for swelling is neatly tucked away, and the healing piercing can drain easily and without issue. Flat-back labrets are very comfortable to wear and look unobtrusive even with extra room for swelling!

Labrets are incredibly secure, and do not carry the same risk of loss that a nostril screw or nose bone do. We will talk about those guys in a minute! Labrets are comfortable, and do not give you that big ‘metal bogey’ sensation. You also can’t see them sticking out of your nose. Winner!

All of our threadless ends are compatible with these labrets, which means you have a huge amount of jewellery to choose from for your initial piercing. You can see our full range of jewellery in-studio, or on our webstore.

You can read more about labrets, the different styles of connection, and the argument of rings vs studs here.

Rings

Rings are a really classic look for nose piercings. It’s usually the end-goal style, and are incredibly popular! However, they are only really suitable for healed piercings. Healed nose piercings do not need extra room for swelling and drainage, and do not need a stopper ‘design’ to avoid irritating your fresh piercing with a seam or hinge. We highly recommend waiting a minimum of three months before swapping to a ring, so your piercing has a chance to heal and settle before changing to this slightly more irritating style of jewellery.

If you chose to start with a ring, it would usually not be the style of ring you imagine! This ring would have to be much thicker in gauge, and larger in diameter, to allow for your initial swelling and drainage of fluids (yummy!). This ring would also mean you are much more likely to snag your piercing, knock it, or rotate and twist it to introduce bacteria. All of these can irritate your piercing and extend your healing time. If you are set on a ring, it’s important to know what you are getting yourself into!

Left: Dainty ring for healed piercings. Right: The style of ring suitable for a fresh nose piercing!

Nostril Screws and Nose Bones

Nostril screws, nose bones and other styles of jewellery are easily lost and made of poor quality materials.

The other options for nostril piercings are nostril screws and nose bones. Nostril screws are those classic ‘corkscrew’ type pieces which you spiral into the piercing and are held in place via the curvature of the post. Nose bones are straight posts with a sharp point or small ball on the inside, so when inserted the ball is pushed through and holds the jewellery in place. We do not recommend either style of jewellery for long term wear, especially nose bones as they can damage your piercing! The main reason these types of jewellery are used is because they are incredibly cheap to manufacture in comparison to high quality threaded or threadless jewellery. There is no real benefit to you as the final customer.

These styles of jewellery lack security, and are the most common cause of lost piercings! They are often made from mystery metals and are cheaply manufactured. We only recommend nostrils screws for well-healed piercings, and only for temporary wear. If your nose piercing is irritated, it is best to swap to a high-quality flat-back labret as a first port of call.

The Piercing Process

Nose piercings are incredibly easy to get, and are not that uncomfortable to get! They do make your eyes water, but this is simply because your eyes don’t need an excuse to water.

The most uncomfortable part of the piercing is usually any clamps and tools that are used. Luckily, we do not use any clamps or tools for nose piercings so they are much more comfortable process for you. For each piercing, we use a single sterile tri-bevel needle, our hands, and your jewellery. Nothing else! This freehand technique is both easier for you, and produces less waste to go to landfill or be incinerated.

Once your nose has been cleaned, marked, disinfected and you are happy with the position, we ask you to lie down. We find that being pierced lying down is much less intimidating for you! Once you are ready, you are asked to take a nice calm breath in. On your exhale is when we pierce you. Once you have been pierced, we pause to insert the jewellery and then you are done! The whole process takes about 5-10 seconds.

Nose Piercing Aftercare

For our full aftercare instructions, click here.

For nose piercings, you want to clean the outside only. The inside of your nose is a self-cleaning location, so you really don’t need to do too much to it at all! The outside of your nose needs to be cleaned just twice a day in the morning and evening, using a sterile saline spray. You want to spritz a little bit onto your piercing, let it soak into any crusties for about thirty seconds, then gently remove any buildup using a piece of folded kitchen roll or nonwoven gauze. Then just pat dry to wick away any excess moisture.

All piercings should be kept dry, which means no bathtubs, hot tubs or swimming for 4-6 weeks. Showers are totally fine though – Just ensure you have some kitchen roll or nonwoven gauze to hand to dry with afterwards!

The final and most important rule is to leave your new piercing alone! You should not be twisting or turning your jewellery, touching your piercing, fiddling with the jewellery or any other action that can disturb your piercing or introduce bacteria.

The Healing Process

Noses are relatively straightforward to heal! We strongly recommend booking a check-up after roughly 4-6 weeks in order for us to downsize the length of your jewellery and check your healing is going well!

You can change the jewellery yourself at home after about 12 weeks if you have been healing well, and you can expect a full heal in about 6 months!

The main cause of issues on nose piercings is overcleaning your piercing and snagging your jewellery, so do just be careful with it and let your body do it’s thing! Getting your downsize at 4-6 weeks is super important to the health of your piercing.

So there you go, an easy overview of nose piercings! There are so many ways to wear them so you can really make them your own. If you have any issues with your nose piercings, please do book a checkup or get in contact so we can help you troubleshoot.

Contact Us

kat@roguepiercing.co.uk

Instagram